
Daffodil care at a glance: Plant bulbs in fall, 6-8 weeks before the first frost. Bury them 6 inches deep (3 times the bulb height). Space 4-6 inches apart. They need full sun to partial shade (at least 6 hours daily) and well-draining soil. After blooming, do NOT cut back leaves for 6 weeks – they need to photosynthesize and store energy for next year's flowers.
Daffodils are the ultimate symbol of spring, bringing bright bursts of yellow to winter-weary gardens. However, ensuring these perennials return stronger every season requires proper daffodil care, especially once the flowers fade.
Whether you are looking for tips on daffodil care after blooming in pots or struggling with preventing daffodil blindness no flowers, the secret lies in managing the bulb's energy cycle.
In this guide, we will unpack exactly when to cut back daffodil leaves, the best fertilizer for daffodils in spring, and how to store daffodil bulbs for next year so your garden stays golden every spring. For more on starting your garden the right way, check out my beginner guide on how to start urban gardening.

The Foundations of Planting
Ideal Soil Depth for Planting Daffodil Bulbs
Planting depth is critical for daffodils. Too shallow, and the bulbs may freeze in winter. Too deep, and they may not have enough energy to reach the surface.
How Often to Water Daffodil Bulbs
Watering is one area where I made mistakes early on. Daffodils do not like soggy soil. Overwatering causes bulb rot, which is often fatal. Water once right after planting. Give the bulbs a good drink to settle the soil. After that, you generally do not need to water again until spring, unless you have an unusually dry winter.
In spring, water when the soil feels dry. Daffodils need consistent moisture while they are growing and blooming. Stick your finger into the soil. If the top inch is dry, water deeply.
Stop watering after the flowers fade. Once the leaves start yellowing, the bulbs are going dormant. They do not need extra water during dormancy.
Well-draining soil is non-negotiable. If your soil holds water, mix in sand or compost to improve drainage. Otherwise, consider planting daffodils in raised beds or containers. If you have a busy schedule, you might want to build a self-watering herb garden. The same principles apply to flowers.
Growing Daffodils Under Trees in Shade
Daffodils are surprisingly shade-tolerant. They can grow under deciduous trees (trees that lose their leaves in winter). This is actually a perfect spot for them.
This is why. Daffodils bloom in early spring, before most trees have leafed out. They get plenty of sunlight in February and March. By the time the trees cast full shade in late spring, the daffodils are already finishing their bloom cycle. To achieve good result:
- Plant bulbs at the base of trees.
- Keep them at least 2 feet away from the trunk to avoid root competition. Use a hand trowel to dig between tree roots.
- Add compost to the planting hole. Tree roots can deplete soil nutrients. A handful of compost gives daffodils a good start.
- Do not plant under evergreen trees. Evergreens cast shade year-round. Daffodils will not get enough light to bloom reliably.
For more ideas on pairing plants, see companion plants for tomatoes – the same companion planting principles apply to flower gardens.
Printable Daffodil Care Chart (Save This)
Here is a quick reference chart you can screenshot or print.
Factor | Daffodil's Preference |
|---|---|
Planting time | Fall (6-8 weeks before first frost) |
Planting depth | 6 inches (3 times bulb height) |
Spacing | 4 to 6 inches apart |
Sunlight | Full sun to partial shade (6+ hours daily) |
Soil | Well-draining, loamy |
Soil pH | Neutral to slightly acidic (6.0 to 7.0) |
Water after planting | Once, then only if dry winter |
Water in spring | When top inch of soil feels dry |
Fertilizer | Low-nitrogen (5-10-10) after blooming |
Hardiness zones | 3 to 8 |
Keep this chart near your garden shed. It will help you remember the key steps.
Spring Maintenance & Feeding

Source: Photo by Mark Pellegrini
Once your daffodils emerge in spring, a little care goes a long way.
Best Fertilizer for Daffodils in Spring
Daffodils are not heavy feeders. However, the right fertilizer at the right time makes a big difference for next year's blooms.
- 1Use a low-nitrogen fertilizer. Look for numbers like 5-10-10 or 10-15-15. The middle and last numbers (phosphorus and potassium) support root and flower development. Nitrogen (the first number) should be lower. Too much nitrogen produces lots of leaves but few flowers.
- 2Apply fertilizer after blooming. This is the most important feeding time. The bulbs are storing energy for next year. Scatter the fertilizer around the plants, not directly on the bulbs. Water it in lightly.
Do not fertilize at planting time. Freshly planted bulbs do not need food. The bulb itself contains all the energy it needs for the first season. Fertilizing at planting can actually burn the new roots.
Compost is always a good option. A thin layer of compost around the plants in spring adds nutrients slowly and safely. It also improves soil structure. For more on fertilizer basics, see indoor plant potting mix.
In the next section, I will share exactly what to do with daffodils after flowering. I will also explain why you must wait 6 weeks before cutting back the leaves. Keep reading to learn the one mistake that could ruin next year's blooms.
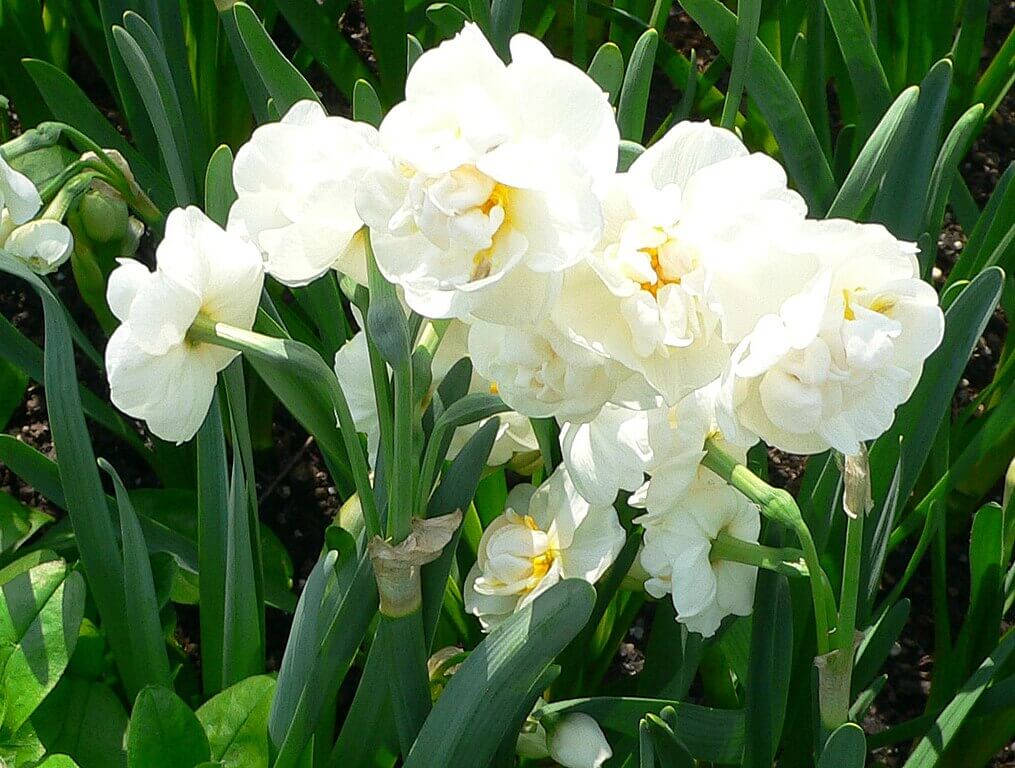
Post-Bloom Management (The Critical Phase)

Source: Photo by Tvines
This is where most gardeners go wrong. I made this mistake for years. My daffodils bloomed less and less each spring. Then I learned the secret.
What to Do with Daffodils After Flowering
After the flowers fade, the plant's work has just begun. The green leaves are solar panels. They collect sunlight and convert it into energy. The bulbs store this energy for next year's blooms.
- Deadhead the spent flowers. Remove the dead flower heads by snipping them off at the stem. This prevents the plant from wasting energy on seed production. However, leave the green leaves and stems completely alone.
- Do NOT cut back the leaves. This is the most important rule. The leaves need to photosynthesize for at least 6 weeks after flowering. If you cut them early, the bulbs do not get enough energy. Next year's flowers will be small or nonexistent.
- Let the leaves turn yellow and brown naturally. Once they are completely dry and crispy, you can gently pull them out or cut them down to soil level. This usually happens 8 to 10 weeks after blooming.
- Tie up the leaves if they look messy. Some gardeners gather the yellowing leaves into a loose bundle and tie them with twine. This keeps the garden looking tidy while the leaves finish their work. Do not cut them.
When to Cut Back Daffodil Leaves
This question comes up every spring. Here is the exact answer.
- Wait 6 to 8 weeks after the flowers fade. Mark your calendar when the last flower dies. Count forward 6 weeks. That is the earliest you should consider cutting leaves. The leaves should be mostly yellow. If they are still green, they are still working. Wait longer. Once they are yellow or brown and floppy, they are done.
- Do not braid or tie the leaves tightly. Some gardeners braid daffodil leaves to make them look neater. However, braiding reduces the surface area exposed to sunlight. It also traps moisture. Just let them be.
- Cut leaves at the base when ready. Use sharp scissors or pruning shears. Cut the dead leaves down to soil level. Do not pull them out. Pulling can disturb the bulbs.
Daffodil Care After Blooming in Pots

Potted daffodils need slightly different care than those in the ground. The bulbs are more exposed to temperature changes.
After flowering, keep the pot in a sunny spot. The leaves need light to store energy. Water when the soil feels dry. Do not let the soil stay wet. Once the leaves turn yellow, stop watering. Let the soil dry out completely. Move the pot to a cool, dark place like a garage or basement. The bulbs are now dormant.
In fall, repot with fresh soil. Remove the bulbs from the old pot. Discard any that are soft or moldy. Plant the healthy bulbs in fresh potting mix at the same depth. Water once, then wait for spring. Potted daffodils bloom well for one season. After that, they may produce fewer flowers. Plant them in the ground to recover for a year or two.
Indoor Potted Daffodil Care After Flowering
For daffodils forced to bloom indoors in winter, the process is the same as for outdoor pots.
After blooming, remove the dead flowers. Keep the pot in a sunny window. Water when the soil feels dry. Let the leaves turn yellow naturally. Once the leaves die back, stop watering. Allow the soil to dry. Store the pot in a cool, dark place for the summer.
In fall, plant the bulbs in the garden. Indoor-forced bulbs rarely bloom well again indoors. They need a season in the ground to recover. Plant them outside at the correct depth. For more on container gardening, see best plants for pots all year round.
Bulb Propagation & Long-Term Storage

Daffodils naturally multiply over time. However, they can become overcrowded. Knowing when and how to divide them keeps your blooms strong.
Can You Leave Daffodil Bulbs in the Ground Year Round?
Yes, in most climates, you can leave daffodil bulbs in the ground year-round. They are perennials. They come back every spring. In zones 3 to 8, bulbs are winter-hardy. They do not need to be dug up. A layer of mulch in late fall provides extra protection in very cold areas.
In zones 9 and warmer, bulbs may need chilling. Daffodils need a cold period to bloom. If your winters are mild, you may need to dig up the bulbs and refrigerate them for 12 to 16 weeks before replanting. Every 3 to 5 years, dig and divide them. Overcrowded bulbs produce fewer flowers. Lifting and separating them rejuvenates the planting.
How to Store Daffodil Bulbs for Next Year
If you need to store bulbs (for transplanting or for climate reasons), follow these steps.
- Wait until the leaves have completely died back. The bulbs are dormant and ready for storage.
- Dig up the bulbs carefully. Use a garden fork or trowel. Lift the bulbs from the soil. Brush off excess dirt. Do not wash them. Moisture promotes rot.
- Inspect each bulb. Keep only firm, healthy bulbs. Discard any that are soft, moldy, or damaged.
- Store in a cool, dry, dark place. A cardboard box with holes for airflow works well. Add dry peat moss or newspaper to absorb moisture. Ideal storage temperature is 50°F to 60°F (10°C to 15°C). Do not store bulbs in plastic bags. Plastic traps moisture. The bulbs will rot.
How to Divide Overgrown Daffodil Bulbs
When your daffodil patch becomes dense and produces fewer flowers, it is time to divide.
- Dig up the entire clump after the leaves have died back. Use a garden fork to loosen the soil around the clump. Lift it out gently.
- Separate the bulbs by hand. Gently pull the bulbs apart. They should come apart easily. Discard any small, shriveled bulbs. Keep the large, firm ones.
- Replant immediately or store for later. If replanting right away, dig new holes at the correct depth. Space bulbs 4 to 6 inches apart. Water well.
Do not divide every year. Dividing too often stresses the bulbs. Every 3 to 5 years is plenty.
Note: Daffodils can sometimes fail to bloom (called "blindness"). Pests like bulb flies can attack. Fungal diseases like basal rot can also occur.
In the final section, I will show you how to troubleshoot these common issues. I will also share natural pest control methods and how to treat bulb rot. Keep reading to solve the most frustrating daffodil problems.
Troubleshooting Common Daffodil Diseases and Pests
Daffodils are generally pest-resistant. However, problems can still occur.
Preventing Daffodil Blindness (No Flowers)
"Blindness" is when daffodils grow leaves but no flowers. This is frustrating. Here are the common causes and solutions.
Leaves cut too early last season
This is the number one cause. Remember the 6-week rule. If you cut leaves before they yellowed naturally, the bulbs did not store enough energy.
Overcrowded bulbs
When bulbs multiply, they compete for nutrients. The patch becomes dense. Fewer flowers appear.
Too much shade
Daffodils need sun. If nearby trees have grown larger, the area may be too shady.
Poor soil nutrition
Daffodils need phosphorus and potassium for flowers. Too much nitrogen (from lawn fertilizer) produces leaves only.
Bulbs planted too shallow or too deep
Shallow bulbs may freeze. Deep bulbs may not reach the surface.
Natural Pest Control for Daffodil Bulb Flies
Narcissus bulb flies are the main pest for daffodils. The adult fly looks like a small bumblebee. It lays eggs near the bulb. The larvae burrow inside and eat the bulb from within.
- Signs of infestation. Stunted growth. Yellowing leaves that flop over. Bulbs that feel soft or hollow. A foul smell from the bulb.
- Prevention is the best defense. Cover the soil with a fine mesh or row cover when flies are active (late spring to early summer). This prevents them from reaching the soil.
- Inspect bulbs before planting. Discard any bulbs that are soft or have small holes. Only plant firm, healthy bulbs.
- Remove infested bulbs immediately. If you find a soft, smelly bulb in your garden, dig it up and throw it away in the trash. Do not compost it. The larvae can spread to other bulbs.
- Encourage natural predators. Ground beetles and some wasps eat bulb fly larvae. Avoid using broad-spectrum pesticides that kill these helpful insects.
For more on natural pest control, see white fuzzy bugs on plants and cabbage worms.
How to Treat Basal Rot in Daffodils
Basal rot is a fungal disease. It attacks the base of the bulb (the basal plate). Infected bulbs turn brown and mushy. The leaves turn yellow and die early.
Cause. Basal rot thrives in wet, poorly drained soil. Overwatering or heavy clay soil encourages the fungus. Prevention is essential. Plant daffodils in well-draining soil. Do not overwater. Do not plant bulbs that are soft or discolored.
If you find rot in one bulb, remove it immediately. Dig up the infected bulb and any nearby bulbs. Discard them in the trash. Do not compost them. Do not replant daffodils in the same spot for 2 to 3 years. The fungus can live in the soil. Plant other flowers (like marigolds or daylilies) in that area while the soil recovers.
Treat healthy bulbs with a fungicide before replanting. This is optional but can help. Follow the package instructions carefully.
FAQs About Daffodil Care
The questions I get asked most often:
What do you do with daffodils after they bloom?
After blooming, deadhead the spent flowers. Leave the green leaves intact. Do not cut them back. Let the leaves turn yellow naturally (about 6 to 8 weeks). Then you can remove the dead leaves.
Should you cut down daffodils after they bloom?
Do not cut down daffodils immediately after blooming. The leaves need to photosynthesize and store energy for next year's flowers. Only cut the leaves when they are completely yellow and dry.
How do you maintain daffodils?
Plant bulbs at the correct depth in fall. Water when the soil is dry. Fertilize with low-nitrogen fertilizer after blooming. Leave the leaves for 6 to 8 weeks. Divide overcrowded clumps every 3 to 5 years.
Should you deadhead daffodils?
Yes, deadhead spent flowers. Snip off the dead flower heads. This prevents the plant from wasting energy on seed production. However, leave the green leaves and stems intact.
Why do my daffodils have no flowers?
The most common causes are cutting leaves too early, overcrowded bulbs, too much shade, or poor soil nutrition. Refer to the "Preventing Daffodil Blindness" section above for detailed solutions.
Can you leave daffodil bulbs in the ground year-round?
Yes, in zones 3 to 8, daffodils are winter-hardy. They can stay in the ground. In warmer zones (9+), they may need to be dug up and chilled in the refrigerator for 12 to 16 weeks.
How deep should you plant daffodil bulbs?
Plant bulbs 6 inches deep, or three times the height of the bulb. Deeper is better than shallower.
Do daffodils spread on their own?
Yes, daffodils naturalize over time. They multiply by producing small offset bulbs. Every 3 to 5 years, you may need to divide them if they become overcrowded.
Final Tips for Daffodils
- 1Mark your calendar after blooming. Count forward 6 weeks. Do not touch the leaves until that date. This one habit will transform your daffodil display over time.
- 2Plant in clusters, not straight lines. Daffodils look more natural in groups of 5 to 7 bulbs. Dig a wide hole and place the bulbs together. Space them 4 to 6 inches apart within the cluster.
- 3Do not give up on blind daffodils. If your daffodils did not bloom this year, wait. Give them a season of good care. Dig and divide them if they are crowded. They will often recover.
If you are just starting your flower gardening journey, read my full guide on how to start urban gardening . It covers soil, containers, watering, and everything else a beginner needs.
And if you love spring bulbs, try pansies care or hyacinth care next.
One more thing before you go...
Let me know your biggest daffodil struggle right now. No flowers? Leaves cut too early? Bulb rot? Or do you have a tip that I missed? I personally reply to every comment within 48 hours.
Second, save this post for later. Pin the printable chart to your Pinterest board. Share this guide with a friend who loves spring flowers. The more people who grow their own flowers, the better.
Now go plant those daffodil bulbs. Next spring, they will thank you.
Happy gardening!
Last Updated on May 14, 2026 by Austine