
Hi there, this guide on how to grow chives indoors is a comprehensive guide for every gardener, made simple for beginners.
If you're a fan of fresh herbs, chives are probably on your radar. They're easy to grow, versatile in the kitchen, and add a delightful touch of green to any indoor space.
Whether you're new to indoor gardening or an experienced grower, learning how to grow chives indoors can be both fun and rewarding.
Chives are a member of the onion family, known for their mild flavor and slender green stalks. They’re one of the easiest herbs to cultivate indoors, making them an excellent choice for urban dwellers or anyone with limited outdoor space.
In this guide, we'll walk you through everything you need to know about growing chives indoors, from planting them from seeds or cuttings to caring for them in water or soil.

If you're curious about other easy-to-grow herbs, check out our guide to beginner-friendly herbs that thrive indoors.
Check out this quick video for some fresh inspiration and see how easy it can be to start growing chives from seeds. You can pair it with our step-by-step guide and get ready to see your chives flourish!"
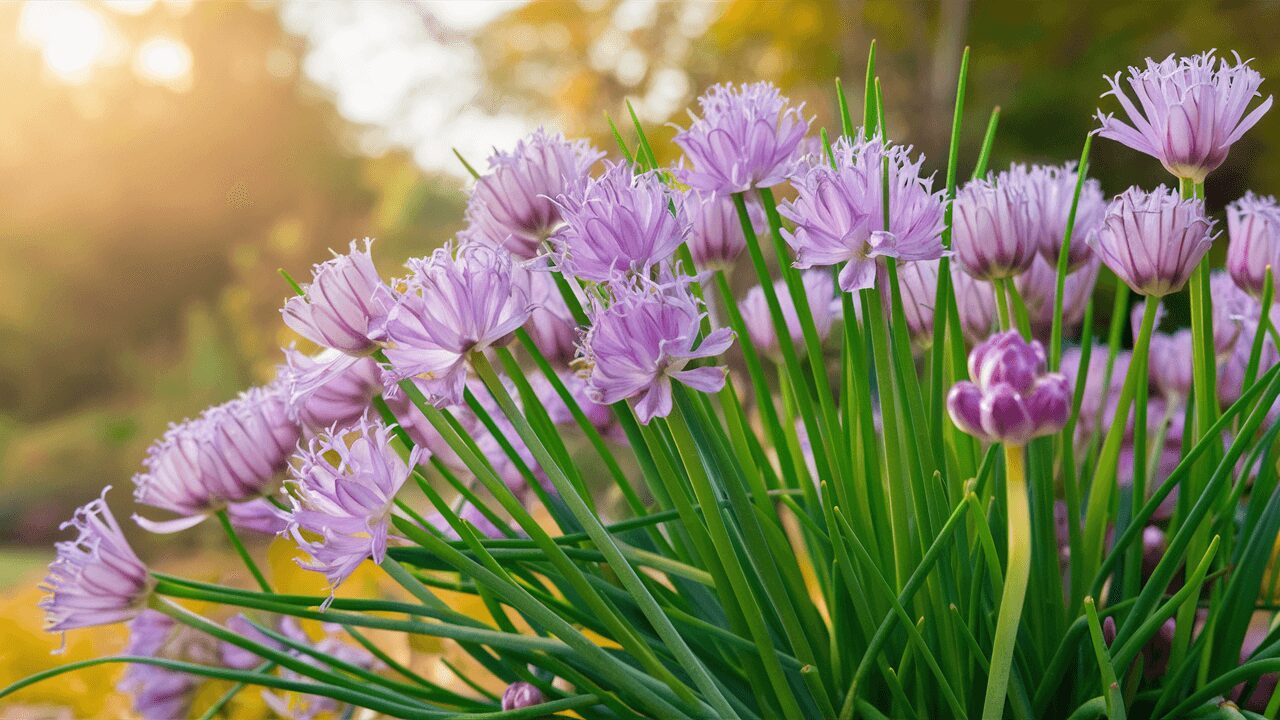
Now, let's look at the Chives overview:
- Botanical Name: Allium schoenoprasum
- Family: Amaryllidaceae
- Plant Type: Herbaceous perennial
- Mature Size: 10-12 inches tall
- Sun Exposure: Full sun to partial shade (6-8 hours of light daily)
- Soil Type: Well-draining, loamy soil
- Soil pH: 6.0-7.0 (slightly acidic to neutral)
- Bloom Time: Late spring to early summer
- Flower Color: Purple or pink
- Hardiness Zones: 3-9 (USDA)
- Water Needs: Moderate; water when the top inch of soil is dry
- Height: 10-12 inches
- Spread: 8-12 inches
- Harvesting: Harvest by cutting leaves about 2 inches above the soil level; can harvest multiple times per season
- Storage: Fresh chives can be stored in the refrigerator for up to a week; can also be frozen or dried for longer storage
- Native Area: Europe, Asia, and North America
Why Grow Chives Indoors?

Before we get into the nitty-gritty of planting and caring for chives, let's talk about why you might want to grow them indoors in the first place. There are several advantages:
- Year-Round Harvest: Growing chives indoors allows you to enjoy fresh herbs all year round, regardless of the season.
- Space-Saving: Chives don’t require much room. A small pot on your windowsill is enough to keep your kitchen stocked with fresh herbs.
- Aesthetic Appeal: Chives add a touch of green to your indoor space, brightening up your kitchen or living area.
- Health Benefits: Chives are rich in vitamins A and C, and they also contain antioxidants that support overall health. If you're interested in growing other herbs from seeds, our post on how to grow Spinach or Thyme indoors might interest you.
Choosing the Right Variety of Chives
When it comes to growing chives indoors, you have two main varieties to choose from: common chives (Allium schoenoprasum) and garlic chives (Allium tuberosum).
- Common Chives: These have a mild onion flavor and are the most common variety. They produce beautiful purple flowers that are also edible.
- Garlic Chives: As the name suggests, garlic chives have a slight garlic flavor. They have flat, broader leaves and produce white flowers.
Both varieties can be grown indoors, so the choice depends on your taste preference and what you plan to use them for in the kitchen.
How to Plant Chives from Seed

Growing chives from seed is a cost-effective way to start your indoor herb garden. Here’s how you can do it:
- Choose the Right Container: Chives have shallow roots, so they don’t require a deep pot. A container that is 6-8 inches deep and has good drainage is ideal. If you're not sure which pots are best, we have a guide on choosing the right containers for indoor gardening.
- Prepare the Soil: Chives prefer well-draining soil that is rich in organic matter. You can use a standard potting mix and add compost or well-rotted manure to enrich it.
- Sow the Seeds: Sprinkle the chive seeds over the soil surface and cover them lightly with a thin layer of soil. Chive seeds are small, so you don’t need to plant them deep.
- Watering: After planting, water the soil gently to moisten it. Keep the soil consistently moist but not waterlogged.
- Provide Light: Chives need plenty of light to grow well. Place the pot in a sunny spot where it can get at least 6-8 hours of sunlight each day. If natural light is insufficient, consider using a grow light.
- Germination: Chive seeds typically germinate within 14-21 days. Be patient and keep the soil moist during this period.
How to Grow Chives from Cuttings

If you already have a mature chive plant, you can propagate it by taking cuttings. This method is quicker than growing from seeds and ensures you get an exact clone of the parent plant.
- Choose Healthy Stalks: Select a healthy, mature chive plant and cut a few stalks that are at least 4-6 inches long.
- Prepare the Cuttings: Trim the stalks and remove any flowers or buds. You want to focus the plant’s energy on rooting, not flowering.
- Place in Water: Put the cuttings in a glass of water, making sure the cut ends are submerged. Place the glass in a bright spot but out of direct sunlight.
- Change the Water Regularly: To prevent the cuttings from rotting, change the water every few days. You should see roots forming within a week or two.
- Planting the Cuttings: Once the roots are a few inches long, you can transfer the cuttings to a pot filled with soil. Plant them at the same depth they were in the water and water them well. For more on propagating herbs, see our guide on how to grow Parsely and Basil herbs from cuttings.
Growing Chives Indoors Without Soil

If you’re looking for a soil-free method to grow chives indoors, hydroponics is a great option. Hydroponics involves growing plants in water, using a nutrient solution to provide the necessary minerals.
- Set Up Your Hydroponic System: You can purchase a hydroponic kit or make your own using a container, a water pump, and a nutrient solution.
- Prepare the Chive Cuttings: As mentioned earlier, take cuttings from a mature chive plant and allow them to root in water.
- Transplant to Hydroponic System: Once the roots are established, transfer the chive cuttings to your hydroponic system. The roots should be submerged in the nutrient solution. Check out our hydroponics for beginners article for more details on getting started.
- Light Requirements: Chives grown hydroponically still need plenty of light. Ensure they receive 12-16 hours of light each day. Grow lights are particularly useful for this purpose.
- Maintain the System: Regularly check the water levels and nutrient concentration in your hydroponic system. Keep the environment clean to prevent algae growth and other issues.
Growing Chives in Pots and Containers

Chives thrive in pots and containers, making them perfect for indoor growing. Here are some tips for success:
- Choose the Right Pot: A pot that is 6-8 inches deep with good drainage holes is ideal. Terracotta pots are a good choice because they allow excess moisture to evaporate, preventing root rot. You might also be interested in our guide to the best pots for indoor herbs.
- Use Quality Potting Mix: A well-draining potting mix enriched with organic matter will give your chives the nutrients they need.
- Watering: Water your chives regularly, but avoid overwatering. The soil should be moist but not soggy.
- Fertilizing: Feed your chives with a balanced liquid fertilizer every 4-6 weeks to encourage healthy growth.
- Light: Place the pots in a location where they can receive plenty of sunlight. A south-facing window is ideal.
Caring for Your Indoor Chive Plants

Once your chives are established, caring for them is relatively simple. Here’s what you need to keep in mind:
- Pruning: Regularly trim your chives to promote bushier growth. Harvest by cutting the leaves about 2 inches from the base. This encourages new growth and prevents the plant from becoming too leggy.
- Pest Control: While chives are relatively pest-resistant, they can occasionally attract aphids or spider mites. If you notice any pests, treat the plants with a mild insecticidal soap or neem oil.
- Rotate Pots: If you’re growing chives in several pots, rotate them regularly to ensure even light distribution and prevent the plants from leaning towards the light.
- Winter Care: Chives are hardy, but they can benefit from some extra care in the winter. If your indoor space is particularly cold, consider moving the plants to a warmer spot or providing additional light.
Harvesting Your Chives
Chives are ready to harvest when they reach about 6 inches in height. Here’s how to do it:
- Use Sharp Scissors: Use clean, sharp scissors to cut the leaves. This prevents damage to the plant.
- Cut from the Base: Cut the leaves about 2 inches from the base of the plant. Avoid cutting more than one-third of the plant at a time to ensure it continues to grow.
- Store Fresh Chives: Freshly harvested chives can be stored in the refrigerator for up to a week. Wrap them in a damp paper towel and place them in a plastic bag.
- Preserve for Later Use: If you have an abundance of chives, you can dry or freeze them for later use. Dried chives retain their flavor well and are a handy addition to your spice cabinet.
Common Problems and Solutions
Even though Chives are relatively low-maintenance, but like any plant, they can encounter a few issues when grown indoors. Here’s how to identify and address common problems:
1. Yellowing Leaves:
- Problem: Yellowing leaves can be a sign of overwatering, poor drainage, or nutrient deficiencies.
- Solution: Ensure your pot has adequate drainage and adjust your watering schedule. If the problem persists, consider adding a balanced fertilizer to provide the necessary nutrients.
2. Leggy Growth:
- Problem: If your chives are growing tall and spindly, they might not be getting enough light.
- Solution: Move them to a sunnier spot or supplement with a grow light. Regularly rotating the pot can also help the plant grow more evenly.
3. Pests:
- Problem: While chives are generally pest-resistant, they can sometimes attract aphids, spider mites, or fungus gnats.
- Solution: Inspect your plants regularly and treat any infestations early with insecticidal soap or neem oil.
4. Slow Growth:
- Problem: If your chives aren’t growing as quickly as expected, it could be due to low light, inadequate nutrients, or improper watering.
- Solution: Ensure your plants are receiving enough light and nutrients, and check your watering routine.
How to Use Chives in the Kitchen
Now that you have a healthy supply of chives, it’s time to put them to good use! Chives are incredibly versatile and can be used in a variety of dishes:
- Salads: Fresh chives add a mild onion flavor to salads. Sprinkle them over greens, potato salads, or pasta salads for a burst of freshness.
- Soups: Stir chopped chives into soups just before serving to retain their flavor and vibrant color. They pair well with creamy soups like potato or tomato bisque.
- Baked Potatoes: A classic use for chives is as a garnish on baked potatoes. Mix them with sour cream or butter for a simple yet delicious topping.
- Egg Dishes: Chives are a perfect match for eggs. Add them to scrambled eggs, omelets, or quiches for a pop of flavor.
- Herb Butters: Create herb-infused butter by mixing chopped chives with softened butter. This makes a great spread for bread or a topping for grilled meats and vegetables.
Expanding Your Indoor Herb Garden

If you’ve enjoyed growing chives indoors, you might want to expand your indoor herb garden. Here are a few herbs that pair well with chives and are also easy to grow indoors:
- Basil: Basil thrives in warm, sunny spots and pairs beautifully with chives in many dishes. For tips on growing basil, see our basil growing guide.
- Parsley: Another versatile herb, parsley grows well indoors and complements the mild flavor of chives.
- Mint: Mint is a hardy herb that can be grown indoors in containers. Its fresh, cool flavor contrasts nicely with chives. Explore more about growing mint in our guide to growing mint indoors.
- Thyme: This low-maintenance herb is perfect for indoor gardening and can be used in a variety of culinary applications. Learn more about thyme in our herb spotlight on thyme.
FAQs
Do chives regrow after cutting?
Yes, chives are known for their ability to regrow after cutting. When you harvest chives, make sure to cut the leaves about 2 inches above the soil. This will allow the plant to continue producing new leaves. Regular harvesting actually encourages the plant to grow more, making chives a great perennial herb for indoor gardening.
Can chives be grown indoors year-round?
Yes, chives can be grown indoors all year-round. As long as they receive enough light—whether natural or supplemented with grow lights—chives will continue to thrive indoors. Maintaining proper watering and ensuring they have a well-draining soil will also contribute to their year-round growth.
How to keep potted chives alive?
To keep potted chives alive, ensure they get plenty of sunlight—ideally 6-8 hours a day. Use a well-draining potting mix and avoid overwatering by letting the soil dry slightly between waterings. Regularly trim the leaves to promote new growth and prevent the plant from becoming too leggy. Feeding with a balanced liquid fertilizer every 4-6 weeks will also help maintain the plant's health.
How often should I water indoor chives?
Indoor chives should be watered when the top inch of the soil feels dry to the touch. On average, this might be once or twice a week, depending on the humidity and temperature of your indoor environment. Be careful not to overwater, as chives prefer slightly moist soil but can suffer from root rot if the soil is too wet.
Can you grow chives indoors all year-round?
Yes, you can grow chives indoors all year-round. With consistent care, including proper lighting and watering, chives will continue to produce fresh leaves throughout the year, even in winter months.
Final Thoughts
Growing chives indoors is a rewarding and straightforward endeavor, perfect for both novice and experienced gardeners. With the right conditions and care, you can enjoy fresh chives year-round, adding a touch of green to your space and a burst of flavor to your meals.
If you're interested in expanding your indoor herb garden, consider adding more herbs to your collection or exploring other indoor gardening tips. Happy gardening!
Want to expand your chive garden?  Check out this video on how to divide and propagate chives with ease. It’s a quick, inspiring watch that pairs perfectly with our chive-growing tips. Hit play and watch your chives multiply!"