Welcome to inch plant care guide!
First things first: what exactly is an inch plant? Well, inch plants are part of the Tradescantia family and get their name because they tend to grow quickly, seemingly inching along as they stretch out their vines. They have gorgeous, glossy leaves that come in shades of green, purple, silver, and even white. You might also hear them referred to as “wandering dudes” (a friendlier version of the outdated wandering Jew).
One thing I absolutely love about inch plants is how versatile they are. They grow so well, look amazing in hanging baskets, and are perfect for those empty corners of your room.
Plus, they’re fairly low maintenance—which, let’s be honest, is a huge selling point for people like me who may not always remember to water them.
This guide will help you understand everything about inch plant care—from picking the right spot to propagating it like a pro. Whether you’re keeping your inch plant indoors, outdoors, or even in a hanging basket, these tips will help you become a plant parent superstar.
Fun fact: The inch plant gets its name from its ability to grow about an inch every week under the right conditions!
Inch Plant Overview
- Botanical Name: Tradescantia zebrina
- Family: Commelinaceae
- Plant Type: Perennial (often grown as an annual or indoor plant)
- Sun Exposure: Bright, indirect light
- Soil Type: Well-draining, loamy or sandy soil
- Soil pH: Slightly acidic to neutral (5.0–6.5)
- Hardiness Zones: 9–11 (USDA)
- Water Needs: Moderate (allow the top inch of soil to dry out between waterings)
- Height: 6–12 inches
- Spread: 12–24 inches
- Sowing: Can be propagated easily through stem cuttings
- Native Area: Mexico, Central America
Inch Plant Benefits
Why even bother with an inch plant? Besides its striking appearance, the inch plant is a real champ when it comes to improving air quality in your home. You’ll breathe a little easier knowing that these guys are filtering out toxins.
Plus, inch plants are known to boost your mental well-being—just having a plant nearby has been shown to reduce stress. So yeah, inch plants aren’t just pretty faces; they’re mood boosters, too!
But let’s not forget the bragging rights. If you’re anything like me, there’s something incredibly satisfying about walking into a room and hearing someone say, “Wow, that plant is stunning! What is it?” and you get to casually throw out, “Oh, that’s just my inch plant.” Nailed it.
Related:
Types of Inch Plants
Okay, so let’s dive into the different types of inch plants because not all of them are created equal. There are a few popular varieties, each with its own little quirks.
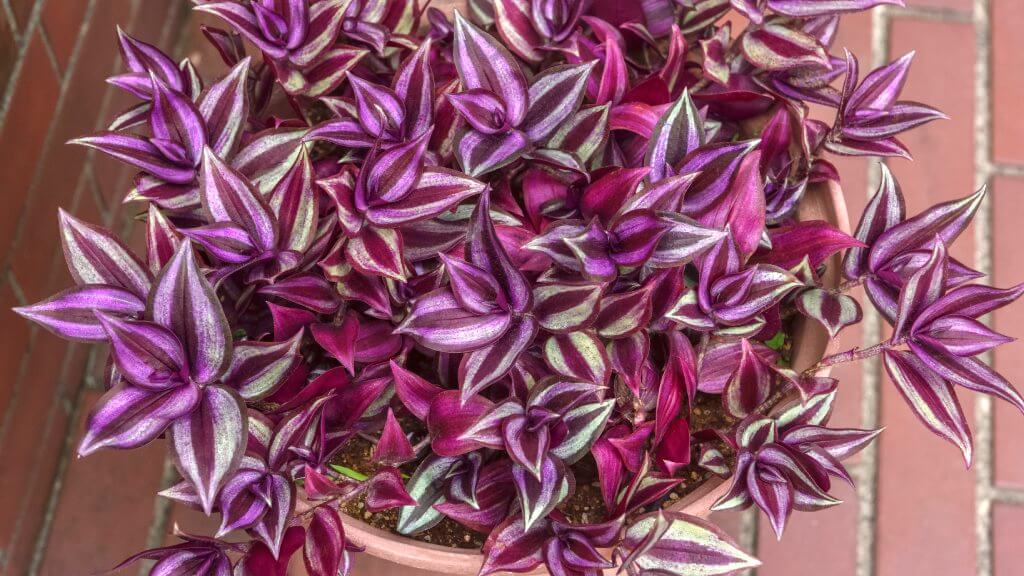
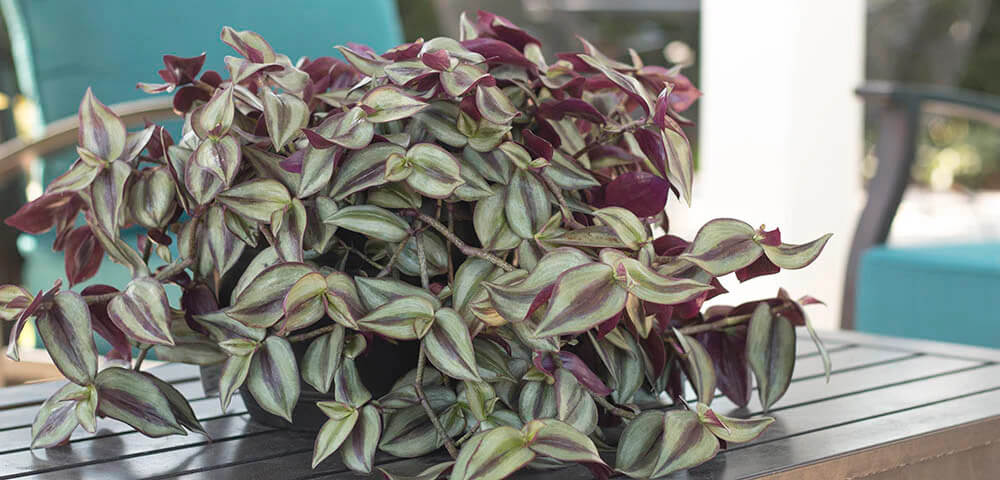
- Tradescantia zebrina: This is the most common one. The green and purple stripes on the leaves are mesmerizing.
- Tradescantia fluminensis: This one’s got plain green leaves, and while it might not be as showy, it’s just as easy to care for.
- Tradescantia pallida: Also known as purple heart, this one’s more of a solid purple and looks amazing in contrast with green-leaved plants.
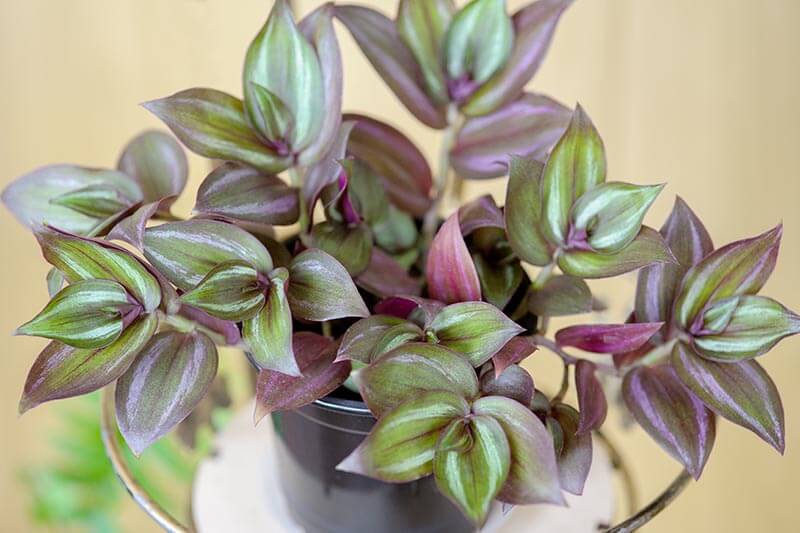
- Tradescantia spathacea: This variety is a bit fancier with purple undersides and green-on-top leaves.
Personally, I’ve had the best luck with Tradescantia zebrina, but they’re all great choices depending on what vibe you’re going for.
Inch Plant Care Tips
Now, here’s where the real fun begins—inch plant care. If you’re ready to grow a thriving, happy plant, buckle up. These tips come from lots of experience (and, yes, a few failures).
1. Light
Inch plants love bright, indirect light. I’ve tried placing mine in lower light, and let me tell you—huge mistake! The leaves lost their vibrant colors, and I ended up with a leggy, sad-looking plant. They thrive best near a window where they can get a few hours of filtered sunlight each day.
Pro tip: If the colors of the leaves are fading or the plant looks stretched out, it's not getting enough light.
2. Water
I’m guilty of overwatering my plants in the past (RIP to all those innocent victims), and inch plants are particularly sensitive to this. They like to be watered when the top inch of the soil is dry. Overwatering can lead to root rot, and no one wants that drama.
3. Soil
These plants aren’t too picky about soil, but they do prefer well-draining soil. I like to use a basic potting mix with a bit of added perlite to make sure things don’t get too soggy.
4. Humidity
Inch plants aren’t tropical divas, but they do appreciate some humidity. If you notice the edges of your leaves browning, your plant is telling you it needs a little more moisture in the air. I’ve had good luck grouping my inch plant with others or misting it occasionally.
5. Fertilizer
If you want your inch plant to really thrive, give it a little snack now and then. I use a balanced, water-soluble fertilizer about once a month during the growing season (spring and summer). But don’t overdo it—too much fertilizer can cause more harm than good.
Inch Plant Care in Hanging Baskets
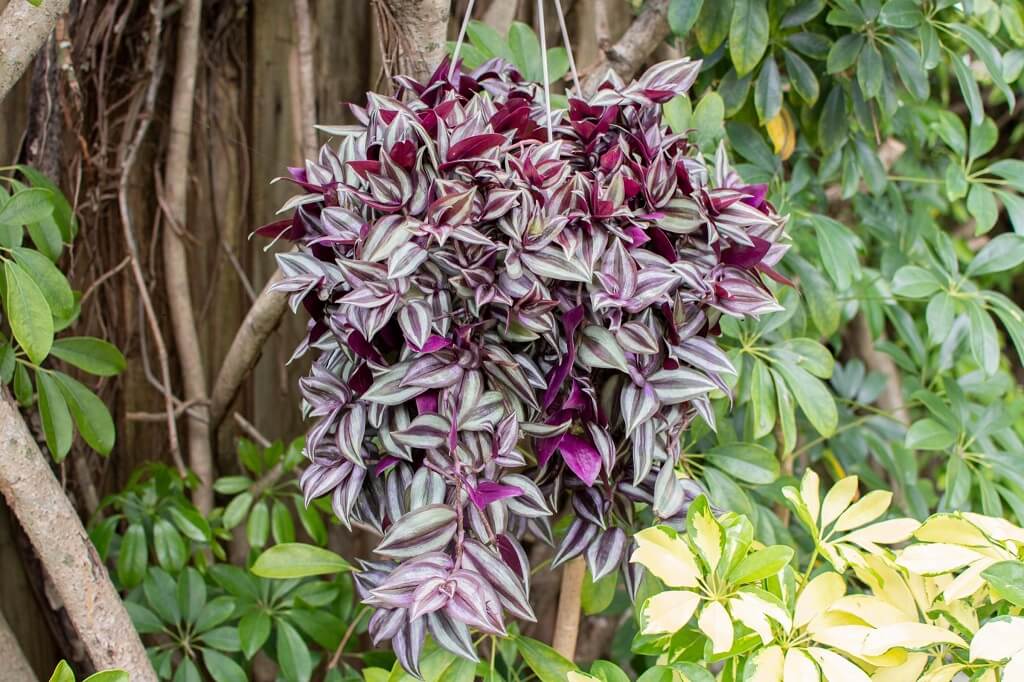
Hanging baskets and inch plants? Match made in heaven. The vines of an inch plant look absolutely stunning draping over the edge of a basket, and they seem to thrive in this setup. Just make sure you’re watering regularly, as hanging baskets tend to dry out faster than regular pots.
One thing I learned the hard way? Don’t let your inch plant get too leggy before you hang it up—it’s much harder to manage at that point. Prune early and often to keep it looking full.
How to Make Inch Plant Bushy
Ah, the age-old question: how do you make an inch plant bushy? The secret is pruning. Regularly trim the tips of your plant, and it’ll encourage more growth along the stems. I made the mistake of letting mine grow wild for too long, and it got scraggly fast. Now, I snip the ends every couple of weeks, and the difference is night and day.
Another trick? Pinch back the tips of new growth to stimulate branching. It sounds scary, but trust me—it’s for the best.
Inch Plant Care Indoors vs. Outdoors
While inch plants are typically grown indoors, they can also thrive outdoors in the right conditions. I’ve tried both, and here’s what I’ve learned.
Inch Plant Care Indoors
Indoors, inch plants need bright, indirect light and regular watering (but not too much!). They also appreciate a little humidity, so if you’re growing them in a dry environment, consider misting them occasionally.
Inch Plant Care Outdoors
Outdoors, inch plants can handle more direct sunlight, but be careful not to scorch them. If you live in a place with hot summers, give them some afternoon shade. Also, keep an eye on the weather—inch plants aren’t frost-tolerant, so if it gets too cold, bring them inside.
Overwintering Inch Plant
Inch plants can’t handle frost, so if you live in a place with cold winters, you’ll need to bring them inside once the temperature starts dipping below 50°F (10°C). Place them in a bright spot indoors and reduce watering. Inch plants tend to go dormant in the winter, so they won’t need as much water as during their growing season.
If your indoor space is dry (like mine always is in the winter), consider misting your plant occasionally or setting up a humidity tray to keep it happy.
Related:
Inch Plant Propagation
Propagating inch plants (Tradescantia) is one of the most rewarding parts of growing them, and it's incredibly easy.
Want to see how easy it is to grow new inch plants? Watch this quick video for a step-by-step guide to inch plant propagation that'll have your plants multiplying in no time!
I remember the first time I tried to propagate mine, I was nervous—what if I killed the cutting? Spoiler alert: I didn’t! These plants are practically foolproof when it comes to propagation, and before I knew it, I had more inch plants than I knew what to do with. Here's how you can do it step by step:
1. Choose a Healthy Stem
First things first, pick a healthy stem to propagate. Look for one that’s about 3 to 6 inches long and has at least a few leaves on it. The stem should be firm and green. Avoid any stems that look wilted, discolored, or damaged—they won’t give you the best results.
Pro tip: Try to choose a stem with nodes (those little bumps where the leaves grow). This is where roots will form.
2. Make the Cut
Using a clean pair of scissors or garden shears, cut just below a node. You’ll want to make a clean cut—no jagged edges or tearing the stem. It’s essential to cut right below the node because that’s where the magic happens! Roots will sprout from that point.
3. Remove the Lower Leaves
Once you’ve made your cut, remove the leaves on the lower part of the stem—especially the ones near the node. You don’t want any leaves submerged in water or buried in soil, as they can rot and mess with the propagation process.
4. Decide: Water or Soil Propagation?
Here’s where you get to make a choice: water or soil propagation. Both work, but I personally prefer water because it’s so satisfying to watch the roots grow. Plus, it’s a great way to keep an eye on the health of your cutting.
- Water propagation: Place your cutting in a glass of water, making sure the node is submerged. I like to change the water every few days to keep it fresh and oxygenated. Within a week or two, you’ll start to see little roots forming. When the roots are about an inch long, it’s time to move the cutting to soil.
- Soil propagation: Stick your cutting directly into a pot filled with well-draining potting mix. Make sure the node is buried in the soil, and keep the soil slightly moist but not soggy. In about 2 to 4 weeks, you should notice new growth, which means roots are forming below the surface.
5. Potting the New Plant
Once your water-propagated inch plant cutting has developed enough roots (about 1-2 inches long), or your soil-propagated cutting shows new growth, it’s time to pot it up. Use a small pot with drainage holes and a well-draining potting mix.
Gently place the cutting in the soil and press down to secure it. Water lightly, just enough to moisten the soil. Be sure not to overwater—inch plants hate soggy feet!
6. Care for the New Plant
Place your newly potted plant in a bright, indirect light spot. Over the next few weeks, keep an eye on the soil to ensure it stays moist but not waterlogged. As the plant settles into its new home, it’ll begin to grow and spread its vines.
And that’s it! You’ve successfully propagated your inch plant. In no time, you'll have a thriving new plant to add to your collection—or give to a friend if you’re running out of room like I did!
When to Plant Inch Plant
If you’re starting from scratch, the best time to plant inch plants is in the spring or early summer when the temperatures are warm, and the plant can focus on growing. This gives them plenty of time to establish themselves before winter rolls around.
Related:
Planting Inch Plants in Pots
Planting inch plants in pots is super straightforward, but there are a couple of things to keep in mind. First, always use a pot with drainage holes. Inch plants don’t like sitting in water, so good drainage is a must. I usually use a well-draining potting mix, adding some perlite for extra aeration.
When repotting or planting your inch plant, choose a pot that’s slightly bigger than the root ball. Too large a pot can hold excess water, which increases the risk of root rot. Keep the soil moist but never soggy, and place the pot in bright, indirect light.
Common Inch Plant Problems
As much as we love inch plants, they do have their fair share of issues. But don’t panic—most of them are easy to fix if you know what to look for. Trust me, I’ve dealt with my share of yellowing leaves, leggy vines, and pests. Here’s a guide to troubleshooting the most common problems and keeping your inch plant in tip-top shape.
1. Yellowing Leaves
This is probably one of the most common problems with inch plants. If your plant’s leaves are turning yellow, it could be a sign of overwatering. Inch plants like their soil to dry out a bit between waterings, so if you’re constantly keeping the soil moist, your plant will start to suffer.
Steps to Fix:
- Step 1: Let the soil dry out completely. Stick your finger about an inch into the soil to check for moisture.
- Step 2: Adjust your watering schedule. Only water when the top inch of soil is dry.
- Step 3: Make sure the pot has proper drainage. If water is sitting at the bottom of the pot, it can lead to root rot, which also causes yellowing leaves.
Tip: If your plant is still struggling, you may need to repot it in fresh, well-draining soil to remove any rotting roots.
2. Leggy Growth
Leggy inch plants happen when they don’t get enough light. If your plant is stretching out with long, thin stems and fewer leaves, it’s probably not getting the bright, indirect light it craves.
Steps to Fix:
- Step 1: Move your plant to a spot with more light, like near a bright window, but avoid direct sunlight, which can scorch the leaves.
- Step 2: Prune back the leggy stems. This not only makes the plant look better but also encourages bushier growth.
3. Brown Leaf Tips
If the tips of your inch plant’s leaves are turning brown and crispy, it could be a sign of low humidity or inconsistent watering.
Steps to Fix:
- Step 1: Check your watering routine. Make sure you’re watering consistently and not letting the plant completely dry out before watering again.
- Step 2: Increase humidity by misting the plant or placing a small humidifier nearby.
- Step 3: You can also group your inch plant with other plants to create a more humid environment.
4. Root Rot
Root rot happens when the plant sits in soggy soil for too long. The roots start to break down, and the plant’s health declines rapidly.
Steps to Fix:
- Step 1: Remove the plant from its pot and gently wash off the soil from the roots.
- Step 2: Trim away any mushy, blackened roots with clean scissors.
- Step 3: Repot the plant in fresh, well-draining soil and reduce your watering frequency.
5. Pests (Spider Mites, Aphids, Mealybugs)
Inch plants are susceptible to pests like spider mites, aphids, and mealybugs, which can suck the life out of your plant—literally.
Steps to Fix:
- Step 1: First, isolate the plant from your other plants to prevent the pests from spreading.
- Step 2: Wipe the leaves with a damp cloth to remove the pests.
- Step 3: Treat the plant with insecticidal soap or a neem oil solution, making sure to get the undersides of the leaves.
Tip: Keep an eye on the plant for the next few weeks, as pests tend to come back if you don’t stay on top of it.
Related:
Final Thoughts
Caring for an inch plant is easy once you get the hang of it, and with the right knowledge, you can keep yours thriving for years to come. Whether you're propagating it for the first time or troubleshooting common issues like leggy growth or yellowing leaves, these tips will help you become a pro.
External resources: For more gardening tips on tomato companion planting, check out The Spruce and Gardening Know How for more companion planting techniques
FAQ
Does an inch plant need sunlight?
Yes, inch plants need sunlight but prefer bright, indirect light. Too much direct sunlight can scorch their leaves, while too little light causes them to grow leggy. If you're growing them indoors, placing them near a bright window works best.
How to maintain an inch plant?
Maintaining an inch plant is easy—just ensure it's in well-draining soil, water it when the top inch of soil is dry, and give it plenty of bright, indirect light. Prune regularly to encourage bushier growth and keep an eye out for pests like spider mites.
Is an inch plant indoor or outdoor?
Inch plants can be grown both indoors and outdoors. Outdoors, they thrive in warm, frost-free environments, while indoors they make excellent houseplants in bright, indirect light. In colder climates, it's best to bring them indoors during winter.
What's wrong with my inch plant?
Common inch plant problems include yellowing leaves from overwatering, leggy growth from insufficient light, or browning leaf tips due to low humidity. Pests like spider mites or aphids can also cause issues. Check your plant’s environment and adjust care as needed.
How often to water Inch Plant?
Water your inch plant when the top inch of soil feels dry to the touch. It’s important not to let the soil get too soggy, as these plants don’t like sitting in water. Generally, watering every 7–10 days works well, but frequency may vary based on the plant's environment.


