
Have you ever walked into a kitchen filled with the aroma of fresh herbs and thought, "Wow, I wish I could grow that at home"? Well, guess what? You absolutely can! Learning how to grow thyme indoors is not only doable but also incredibly rewarding.
Whether you live in a small apartment or just want fresh herbs year-round, growing thyme indoors is a perfect choice. Let’s dive into the wonderful world of indoor thyme gardening!
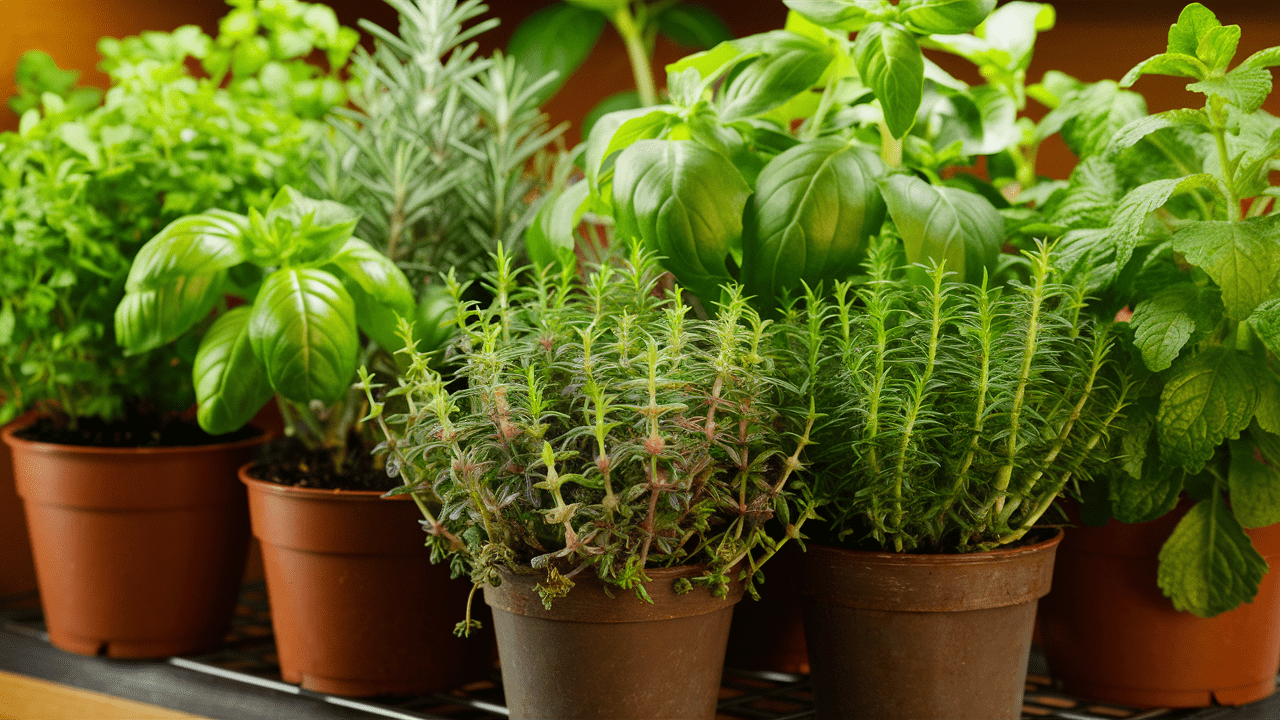
Benefits of Growing Thyme Indoors
- Year-Round Freshness: No matter the season, your thyme will be ready for harvest.
- Space Saver: Perfect for small spaces, balconies, or windowsills.
- Low Maintenance: Thyme is a hardy plant that doesn’t require much fuss.
- Aesthetic Appeal: Adds a beautiful green touch to your home decor.
- Health Benefits: Thyme is known for its antiseptic properties and can boost your immune system.

Why Grow Thyme Indoors?
Growing thyme indoors brings a touch of green into your home, adds flavor to your dishes, and even has some surprising health benefits.
This hardy herb is perfect for urban gardening enthusiasts. Imagine snipping off a few sprigs of fresh thyme to garnish your roasted chicken or mix into your pasta sauce. Sounds dreamy, right?
Choosing the Right Thyme Variety
Did you know there are over 50 varieties of thyme? While that might sound overwhelming, don’t worry! We'll be focusing on three popular varieties: English thyme, Lemon thyme, and Creeping thyme.
But first, let's start with the basics for each type of thyme. Ready? Let's get our hands dirty!
English Thyme

English thyme, also known as common thyme, is a culinary superstar. It’s the go-to thyme for chefs around the world, thanks to its versatile flavor that pairs well with just about anything. This variety has small, gray-green leaves and produces lovely pink or purple flowers in the summer.
English thyme is a perennial, meaning it will come back year after year if taken care of properly. It’s also fairly low-maintenance, making it perfect for beginners. Just give it plenty of sunlight, and it will reward you with its fragrant leaves all year long.
When growing English thyme indoors, place it near a south-facing window where it can soak up at least six hours of sunlight each day. If you don’t have enough natural light, consider using a grow light to keep your thyme happy and healthy.
Quick tip:
- Description: Classic variety with tiny, fragrant leaves.
- Best For: Culinary uses like soups, stews, and roasts.
- Flavor: Has a strong, earthy flavor that complements a wide range of dishes.
Lemon Thyme

Lemon thyme is a delightful variety with a citrusy twist. As the name suggests, it has a lovely lemon scent and flavor, making it a fantastic addition to teas, desserts, and chicken dishes.
This thyme has bright green leaves and, like English thyme, produces small flowers in the summer.
Lemon thyme is just as easy to grow as English thyme. It loves full sun and well-drained soil. When growing indoors, place it in a bright spot, and it will thrive.
If you’re feeling fancy, you can even use it as a decorative plant because of its beautiful, fragrant leaves.
Quick tip:
- Description: Light, lemony flavor.
- Best For: Fish dishes, teas, and desserts.
- Flavor: Provides a citrusy twist to your meals, making it perfect for summer recipes.
Pro tip: Lemon thyme is a great companion plant for other herbs like rosemary and sage. They all have similar growing requirements and look great together.
Creeping Thyme

Creeping thyme is a ground-covering variety that’s perfect for those looking to add a little greenery to their indoor space. It has tiny leaves and produces a carpet of pink, white, or purple flowers.
This thyme is not only pretty but also functional, as it can help prevent soil erosion in outdoor gardens.
When growing creeping thyme indoors, it’s important to give it a bit of room to spread out. It’s a great choice for hanging baskets or shallow pots.
Like its cousins, creeping thyme loves the sun but can tolerate a bit of shade. Just make sure the soil is well-drained to prevent root rot.
Quick tip:
- Description: Low-growing and spreads easily.
- Best For: Decorative ground cover, hanging pots.
- Flavor: Slightly milder flavor, great for garnishing.
Extra Varieties
Silver Thyme
Silver thyme is a striking variety with silvery-gray leaves that add a touch of elegance to any herb garden. It has a mild flavor, making it a great choice for garnishing dishes or adding a subtle thyme taste to your cooking.
Silver thyme requires the same care as English thyme. It needs full sun, well-drained soil, and a bit of love. This thyme is also a perennial, so it will keep coming back year after year.
Caraway Thyme
Caraway thyme is a unique variety with a distinct caraway scent and flavor. It’s often used in bread and meat dishes, thanks to its aromatic qualities. This thyme has dark green leaves and pink flowers.
Growing caraway thyme indoors is a breeze. Like other thyme varieties, it loves the sun and well-drained soil. Place it in a bright spot, and you’ll have a thriving plant in no time.
How to Grow Thyme Indoors from Seed

Starting thyme from seeds can be a fun project. Here's a step-by-step guide to get you going.
Step 1: Gather Your Materials
- Thyme Seeds: You can find these at garden centers or online.
- Seed Starting Mix: Light and well-draining.
- Containers: Small pots or seed trays with drainage holes.
Step 2: Planting the Seeds
- Fill Your Containers: Fill each pot or tray with seed starting mix.
- Sow the Seeds: Scatter a few thyme seeds on top of the soil and lightly cover with a thin layer of soil.
- Water Gently: Use a spray bottle to moisten the soil without washing away the seeds.
Step 3: Germination
- Light Requirements: Place the containers in a sunny spot or under grow lights.
- Temperature: Keep the soil warm, around 70°F (21°C).
- Watering: Keep the soil moist but not soggy.
In about 2-3 weeks, you’ll see tiny thyme sprouts poking through the soil. How exciting!
Step 4: Transplanting Seedlings
Once your thyme seedlings have grown a few sets of true leaves, they’re ready to be transplanted into larger pots.
- Choose a Pot: Select a pot that is at least 4 inches in diameter with drainage holes.
- Prepare the Soil: Use a well-draining potting mix. Adding a bit of sand can improve drainage.
- Transplant Carefully: Gently remove the seedlings from their current container, being careful not to damage the roots. Place them in the new pot and fill in with soil.
- Water: Give your newly transplanted thyme a good drink of water to help it settle into its new home.
How to Grow Thyme from Cuttings

If you're not up for starting from seeds, growing thyme from cuttings is a quicker option.
Step 1: Take a Cutting
- Choose a Healthy Plant: Find a mature thyme plant.
- Cut a Stem: Snip a 4-6 inch piece of stem just below a leaf node.
Step 2: Prepare the Cutting
- Remove Lower Leaves: Strip the leaves off the bottom half of the stem.
- Dip in Rooting Hormone (Optional): Helps speed up the rooting process.
Step 3: Plant the Cutting
- Prepare the Pot: Fill a small pot with a light potting mix.
- Insert the Cutting: Make a hole in the soil and gently insert the stem.
- Water and Cover: Water lightly and cover with a plastic bag to create a mini greenhouse effect.
In a few weeks, you should see new growth, indicating that your cutting has rooted. Easy peasy!
Step 4: Transplanting Rooted Thyme Cuttings
Transplanting rooted cuttings is an essential skill for any gardener, especially when it comes to thyme. It's a fantastic way to propagate this aromatic herb and expand your indoor garden.
Here's a step-by-step guide to help you master this process.
Preparing Your Thyme Cuttings
Before you even think about transplanting, you need to ensure your thyme cuttings are healthy and well-rooted. Here are some tips to prepare your cuttings:
- Check the Roots: Gently remove your cuttings from their rooting medium (water, perlite, or soil) and inspect the roots. They should be white and well-developed.
- Acclimatize Your Cuttings: If your cuttings were rooting in water, gradually acclimate them to soil by placing them in a mix of half soil and half water for a few days.
Preparing the Soil
Good soil is crucial for the success of your transplanted thyme cuttings. Here’s how to prepare it:
- Choose the Right Soil Mix: Use a high-quality potting mix that is well-drained and rich in nutrients. For thyme, a mix of potting soil, perlite, and compost works well.
- Sterilize the Soil: To prevent diseases, you can sterilize the soil by baking it in the oven at 180°F (82°C) for 30 minutes. This step is optional but recommended if you’re using garden soil.
Transplanting the Thyme Cuttings
Now comes the exciting part—transplanting your rooted thyme cuttings into their new home:
- Choose the Right Time: Transplant your cuttings in the early morning or late afternoon when temperatures are cooler. This helps reduce transplant shock.
- Prepare the Container: Fill your chosen container with the prepared soil mix, leaving about an inch of space at the top.
- Create a Hole: Use your finger or a small tool to make a hole in the soil. The hole should be deep enough to accommodate the roots without bending them.
- Insert the Cutting: Place the cutting in the hole, ensuring the roots are spread out and not tangled. Gently press the soil around the base of the cutting to secure it.
- Water Thoroughly: After planting, water the cutting thoroughly to help settle the soil and remove any air pockets.
Choosing the Right Container for Thyme
Selecting the appropriate container is just as important as the planting technique. The right container ensures your thyme has enough space to grow and thrive. Here’s what to consider when choosing a container:
Container Material
Containers come in various materials, each with its own advantages and disadvantages:
- Plastic: Lightweight, affordable, and available in many sizes and colors. However, they may not be as durable as other materials.
- Terracotta: These clay pots are breathable, allowing air and moisture to move through the walls. They’re great for thyme because they help prevent overwatering but can be heavy and breakable.
- Ceramic: Often glazed and available in beautiful designs. They retain moisture well but can be heavy and may lack drainage holes.
- Fabric: Fabric pots are lightweight and promote air pruning of roots, which helps prevent root-bound plants. They’re ideal for larger plants but may dry out faster than other types.
Container Size
Choosing the right size container is crucial for the health of your thyme plants. Here’s a quick guide:
- Small Plants: For small thyme cuttings or young plants, a 4-6 inch pot is usually sufficient.
- Medium Plants: For medium-sized thyme plants, such as established cuttings, a 6-10 inch pot works well.
- Large Plants: For larger thyme plants or those with extensive root systems, choose a pot that’s at least 12 inches in diameter and depth.
Drainage
Proper drainage is essential to prevent root rot and ensure healthy growth. Here’s how to ensure your container provides adequate drainage:
- Drainage Holes: Make sure your container has drainage holes at the bottom. If it doesn’t, you can drill holes yourself or use it as a decorative outer pot with a smaller, well-draining pot inside.
- Use a Saucer: Place a saucer under the container to catch excess water. This helps prevent water damage to surfaces and allows you to monitor how much water the plant is receiving.
- Add a Layer of Rocks: For extra drainage, you can add a layer of small rocks or gravel at the bottom of the container before adding soil.
Mobility
Consider the weight and mobility of the container, especially if you plan to move your thyme around:
- Lightweight Containers: If you need to move your plants frequently, choose lightweight containers like plastic or fabric.
- Wheeled Caddies: For larger, heavier pots, use wheeled caddies to make moving them easier.
- Hanging Baskets: For small spaces, hanging baskets are a great option. They save floor space and can add a decorative touch to your indoor garden.
Effective Planting Techniques for Thyme
The way you plant your thyme cuttings can significantly impact their growth and overall health. Here are some effective planting techniques to ensure your thyme thrives:
Technique 1: The Right Depth
Planting your thyme cuttings at the right depth is crucial. If planted too shallow, the roots may dry out; if planted too deep, the cutting might rot. A good rule of thumb is to plant the cutting so that the base of the stem is level with the soil surface.
Technique 2: Proper Spacing
If you're planting multiple thyme cuttings in a single container, make sure to space them adequately. Overcrowding can lead to competition for nutrients and light, hindering their growth.
A general guideline is to space small cuttings about 2-3 inches apart and larger cuttings about 4-6 inches apart.
Technique 3: Supporting the Cuttings
Some thyme cuttings, especially those of taller varieties, may need support to stay upright until their roots establish. You can use small stakes or garden ties to provide support. Be gentle when tying the cuttings to avoid damaging the stems.
Technique 4: Providing the Right Environment
Creating the right environment for your thyme cuttings is key to their success. Here’s what to keep in mind:
- Humidity: Young cuttings benefit from higher humidity levels. You can create a mini greenhouse effect by covering the container with a plastic bag or using a humidity dome.
- Light: Thyme cuttings need bright, indirect light. Too much direct sunlight can scorch the leaves, while too little light can cause leggy growth. A south or east-facing window is usually ideal.
- Temperature: Keep the cuttings in a warm environment, ideally between 65-75°F (18-24°C). Avoid placing them in drafty areas or near heating vents.
Best Soil for Thyme in Pots

Now that we’ve covered transplanting, planting techniques, and container selection, let’s talk about the best soil for growing thyme in pots.
Thyme is not a fussy plant, but it does have some specific soil preferences. Here are some tips to ensure your thyme thrives:
- Well-Drained Soil: Thyme hates soggy roots, so it’s crucial to use well-drained soil. A sandy or gritty soil mix is ideal. You can buy a pre-made cactus or succulent mix, or make your own by mixing equal parts potting soil, sand, and perlite.
- Nutrient-Rich: While thyme doesn’t need super-rich soil, it does appreciate some nutrients. You can add a bit of compost or slow-release fertilizer to your soil mix to give your thyme a little boost.
- pH Level: Thyme prefers a slightly alkaline to neutral pH level. You can test your soil’s pH and adjust it if necessary. Adding a bit of lime can help raise the pH if your soil is too acidic.
Caring for Indoor Thyme Plants

Growing thyme indoors is a delight, but it doesn't end with just planting and transplanting. Proper care is essential to keep your thyme thriving. Here's a brief guide on how to care for your indoor thyme plants:
Light
Thyme loves sunlight! Place your thyme plant in a location where it can get at least 6-8 hours of direct sunlight each day. A south or west-facing window is usually ideal. If natural light is limited, consider using a grow light to supplement.
Watering
Thyme prefers slightly dry conditions, so be careful not to overwater. Water the plant when the top inch of soil feels dry to the touch.
Ensure the pot has good drainage to prevent water from sitting at the bottom, which can lead to root rot.
Humidity
Thyme plants are not too fussy about humidity, but they do prefer a slightly drier environment. Regular household humidity levels are usually fine.
Avoid placing thyme in overly humid areas like bathrooms or next to humidifiers.
Feeding
Thyme doesn’t require heavy feeding. A light application of a balanced, water-soluble fertilizer once a month during the growing season (spring and summer) is sufficient. Be careful not to over-fertilize, as this can lead to less flavorful leaves.
Pruning
Regular pruning helps keep your thyme plant healthy and encourages bushy growth. Pinch off the tips of the stems regularly, especially if the plant starts to look leggy.
Use the pruned thyme in your cooking – it’s a win-win!
Pest Control
Indoor thyme plants are generally resistant to pests, but occasionally you might find aphids or spider mites. If you notice any pests, treat the plant with a mild soapy water spray or an insecticidal soap.
Air Circulation
Good air circulation is essential to prevent mold and mildew. Ensure your thyme plant has space around it and is not overcrowded with other plants.
Growing Thyme Indoors in Winter

Thyme is pretty low maintenance, but there are a few key things to keep in mind. During winter, indoor conditions can change. Here’s how to keep your thyme happy:
- Light: Ensure it still gets enough light. You might need to supplement with grow lights.
- Temperature: Keep your thyme in a cool room, away from heating vents.
- Watering: Water less frequently, as growth slows down in winter.
When and How to Harvest Thyme
When your thyme plant is lush and full, it’s time to harvest!
- When: You can start harvesting once the plant is established. Aim for when the plant has plenty of growth, usually after about 2-3 months.
- How: Use sharp scissors to snip off sprigs. Harvest from the top to encourage bushier growth.
Tips for Using Fresh Thyme
- Cooking: Add fresh thyme to soups, stews, and roasted dishes.
- Tea: Steep fresh thyme in hot water for a soothing tea.
- Storage: Store fresh thyme in the fridge wrapped in a damp paper towel or freeze for long-term use.
Creative Ways to Use Thyme in Your Home

Source: Photo by Madeleine
Not only is thyme a great addition to your culinary arsenal, but it also has many other uses around the home.
DIY Thyme Infused Oil
Ingredients: Fresh thyme, olive oil.
Instructions:
- Fill a jar with fresh thyme sprigs.
- Pour olive oil over the thyme, ensuring it's completely covered.
- Seal the jar and let it sit for 2-3 weeks.
- Strain the oil and use it in cooking or as a salad dressing.
Thyme-Infused Cleaning Spray

Ingredients: Fresh thyme, vinegar, water.
Instructions:
- Fill a spray bottle with equal parts vinegar and water.
- Add a handful of fresh thyme.
- Let it sit for a few days to infuse.
- Use as a natural, aromatic cleaning spray.
Thyme Sachets for Freshening Up
Ingredients: Dried thyme, small fabric bags.
Instructions:
- Fill small fabric bags with dried thyme.
- Place the sachets in drawers, closets, or your car for a fresh scent.
Fun Facts About Thyme
- Historical Uses: Ancient Egyptians used thyme for embalming, and it was a symbol of bravery in medieval times.
- Health Benefits: Thyme is rich in vitamins A and C, and it has antiseptic properties.
- Cultural Significance: In ancient Greece, thyme was used in baths and burned as incense in temples.
FAQs
How Often to Water Thyme Indoors
Watering Schedule: Water when the top inch of soil feels dry.
Overwatering: Be careful not to overwater. Thyme prefers slightly dry soil.
Does Thyme Need Full Sun to Grow?
Light Requirements: Thyme loves light! Place your pots in a sunny window or under grow lights. Aim for at least 6 hours of sunlight a day.
How Much Room Does Thyme Need?
Space: Give each thyme plant about 6-12 inches of space to grow. If the plant gets too bushy, you can trim it back to maintain its shape.
Does Thyme Come Back Every Year?
Yes! Thyme is a perennial herb, which means it can come back year after year if cared for properly.
Can You Grow Thyme Indoors Year-Round?
Absolutely! With the right care, thyme can thrive indoors all year.
How Long Does Thyme Take to Grow?
From seeds, thyme takes about 2-3 weeks to germinate and a few months to be ready for harvest.
How Do You Grow Potted Thyme?
Follow the steps above for planting and caring for thyme in pots, and you’ll have a healthy plant in no time.
Can Thyme Be Grown as a Houseplant?
Yes! Thyme makes a great houseplant with its fragrant leaves and attractive growth.
Final Thoughts
Growing thyme indoors is a rewarding and enjoyable experience. Whether you choose English thyme, Lemon thyme, Creeping thyme, or one of the extra varieties like Silver thyme or Caraway thyme, you’ll have a fragrant and versatile herb right at your fingertips.
Remember to provide plenty of sunlight, well-drained soil, and a little love, and your thyme will thrive.
So, what are you waiting for? Grab some thyme seeds or plants, get your pots ready, and start your indoor herb garden today. Happy gardening, and may your thyme thrive! 
If you have any questions or tips to share, feel free to leave a comment below. We’d love to hear from you! And don’t forget to check out our other gardening posts for more indoor gardening inspiration.
Read Next:
Here are some great external resources for further reading on growing herbs indoors:
Old Farmer's Almanac – A comprehensive guide to growing herbs indoors
Epic Gardening – Tips and tricks for indoor herb gardening